With so many customisation options and methods out there, it is difficult to know which one to go for. That's why we've put together this handy guide to help you make your decision.
You'll be guided through the whole process from deciding which finishing method to use, to placing an order.
We will give you a basic introduction to different custom finishing methods, and highlight key differences between commonly used decoration methods. We will also discuss the variables you should consider for each finishing method before you start an order. Meanwhile, you will also guided on how to prepare your digital assets for custom finishing.
With comprehensive and easy-to-follow information, you will be able to find a customisation option that most suits your budget, order quantity and uniform requirements.
Introduction
- What is Custom Decoration and Finishing?
- Different Custom Finishing Methods
- Custom Print vs Custom Embroidery
Beginner's Guide to Custom Print:
- Introduction to Screen Printing
- Before you Start a Custom Print Order
- Preparing your Digital Assets
Beginner's Guide to Custom Embroidery:
- Introduction to Embroidery and Embroidered Tag
- Before you Start a Custom Embroidery Order
- Preparing your Digital Assets
Conclusion:
- The Importance of Quality Finishing
Introduction To Custom Printing, Embroidery and Decorations
What is Custom Decoration and Finishing?
Custom decoration and finishing refers to the application of logo, name or other custom details on corporate uniform and workwear. It involves methods such as print and embroidery. With custom decoration and finishing, you get custom uniforms that are personalised for your company, corporation or even employee. It is an effective way of uniform branding, and allows you to affix your company logo, brand logo, corporation logo or other custom logo to your requirement.
Other than uniform, it can also be used to produce corporate or promotional merchandise.
Custom decoration allows you to optimise your corporate uniform and workwear for identification, management and branding purposes – we've outlined the importance in a later section.
First, let's go through the different custom finishing methods available.
Different Custom Finishing Methods
Custom Print
Silkscreen Printing
What it is: Ink passes through a special screen with your image and is printed onto garment or product. The screen is like a stencil, where the ink passes through and prints onto your fabric where you want it.
Suitable for: Logos and simple artworks with minimal colours involved.
Good for: Cost-effective option for large quantities and mass production.
Direct-to-Garment (DTG)
What it is: Image or text printed directly onto garment or product. Think of your regular office printer, this is the same thing except it's printing on fabric not paper.
Suitable for: Photographic, detailed and complex images.
Good for: Small-scale customisation and colourful designs.
Heat Transfer
What it is: Image is digitally printed, then applied onto the garment or product and fixed using high heat. You can think of this as a 'sticker' that is permanently bonded onto the material with high temperatures.
Suitable for: Small logos and linear artwork.
Good for: Specially finishings such as metallic foil.
Custom Embroidery
Embroidery
What it is: Image or text embroidered directly onto garment or product
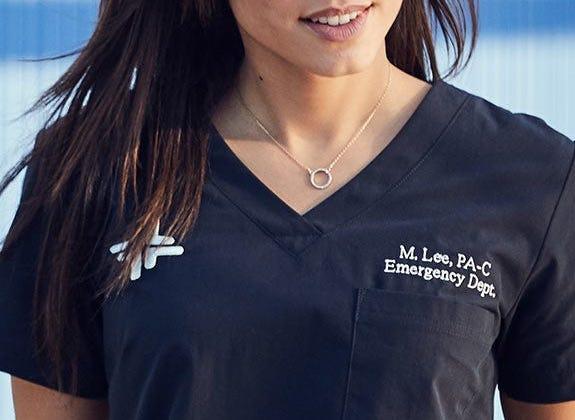
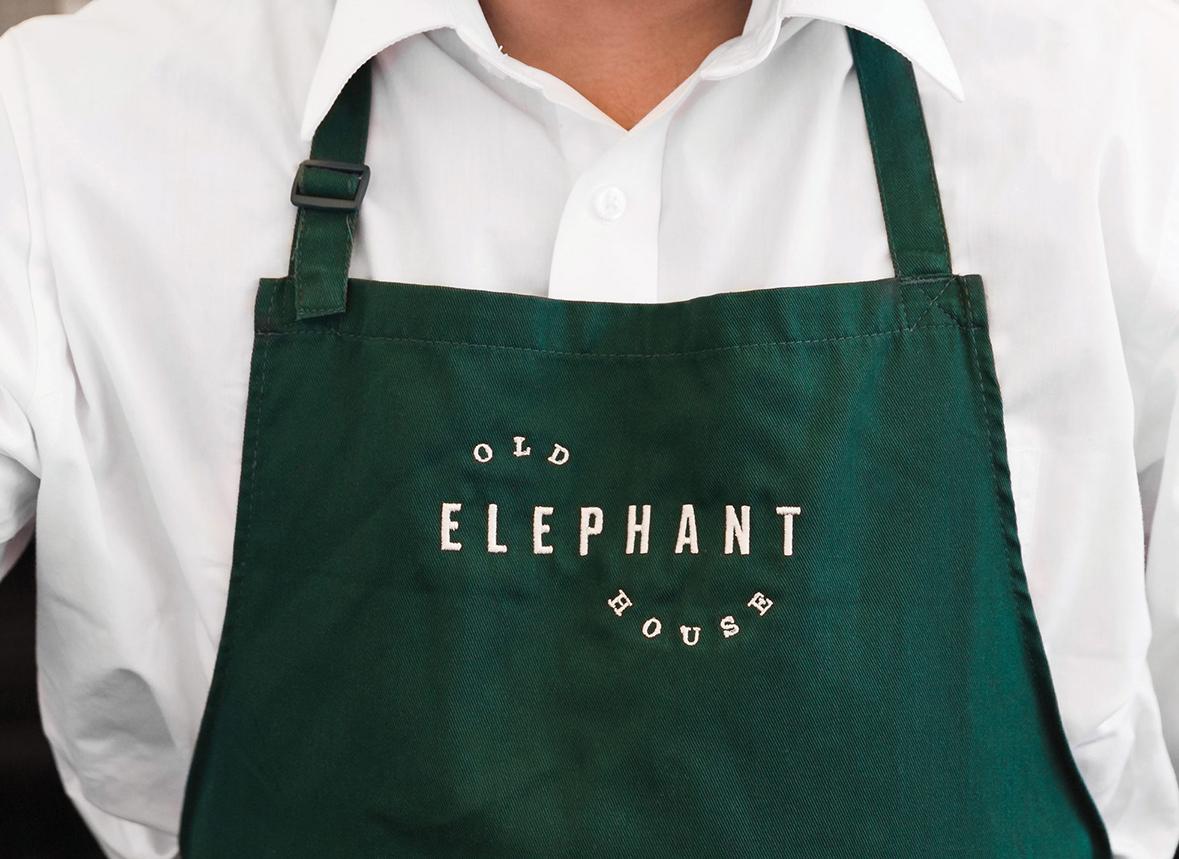
Suitable for: Brand logo, statement logo and custom name embroidery
Good for: Long-lasting and durable when applied onto garment or product.
Embroidered patches or tags
What it is: Image or text embroidered on a separate piece or patch, that can be applied to garment or product by sewing, iron-on or velcro
Suitable for: Custom name tag, laundry tag, logo tag and other branding patches
Good for: Embroidered patches can be interchangeable or replaced without needing to replace the entire uniform or product.
Custom Printing vs Embroidery
So, custom print or embroidery? We hear you asking. With screen printing and embroidery being the two most commonly used finishings, how do you choose between them? Let's highlight the main differences between the two.
Cost and Quantity
The cost for each finishing works out differently depending on your order quantity. For example, screen printing is more cost effective on large order quantities, compared to embroidery.
Silkscreen printing involves a screen fee (this is a set-up fee charged per order), while bearing lower print fee per piece. For large orders, this set-up fee is spread across large quantities. The printing cost per piece thus works out to be more cost efficient. Meanwhile, the set-up fee for embroidery is lower while embroidery fee per piece is higher. If you require only small quantities then it is worthwhile to go for embroidery as you won't need to pay a hefty set-up fee.
In short, silkscreen printing is more cost-effective for bigger order quantities. Embroidery is more cost-effective for smaller order quantities.
(If you still prefer printing, however, you can go for DTG or heat transfer. These print options are viable and relatively cost-effective for small orders, albeit more time consuming.)
Lead Time
Another important factor to consider will be lead time. Generally speaking, for the same order size, custom screen printing gives a shorter lead time than custom embroidery.
For screen printing, once the screen and alignment are all set up, it is quite quick to print each piece. Comparatively, it takes longer to run the embroidery on the machine for each piece of customisation. If your order quantity is large, screen printing will be substantially faster than embroidery.
Size of Customisation
For larger customisations, silkscreen printing is recommended. You can print up to A3 sizes.
However, keep in mind that you should try to keep it within standard A5, A4 and A3 dimensions as you will be charged according to size.
Embroidery is only cost-effective and efficient up to standard logo size. Anything bigger tends to be more expensive. Print options are recommended for that instead.
Quality
Compared to print, embroidery better withstands wash and use overtime. If you want to create something that you intend to keep for the long run, choose embroidery.
Embroidery also gives a more tactile and textured effect on fabric. Thus resulting in a higher perceived value and a more professional finish.
However, if it's something you only require for the short term, print options are more than enough to do the job. For example, if you are making promotional and marketing products and merchandise. Or, if it is uniform that is to be regularly replaced.
Placement of Customisation and Type of Product
The primary distinction is that custom printing requires a flat surface whereas embroidery does not.
Both print and embroidery are good for standard uniform options such as t-shirts, polo shirts, formal shirts, jackets and so on.
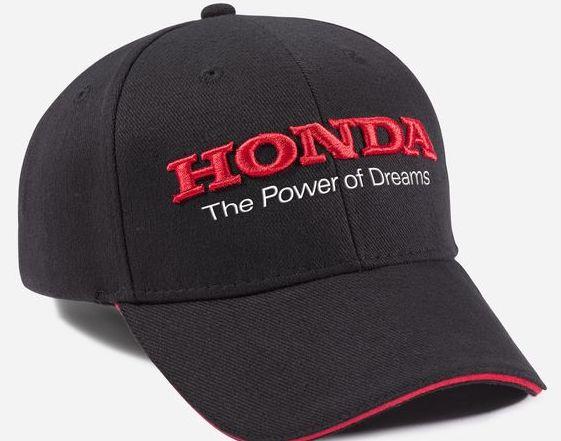
For specific products, such as hats and caps, only custom embroidery is viable. The curved surfaces of such products cannot be printed.
Beginner's Guide to Custom Printing
In this section we will introduce you to custom printing – what it is and how it works. At the same time, we will run through the specifications you should prepare before placing a custom order. We'll also guide you on how you can optimise your artwork for screen printing.
As mentioned before, custom print methods include screen printing, direct-to-garment (DTG) and heat transfer. While other options suit more complex and intricate design, screen printing is still the favoured option when it comes to custom uniform. It is a cost-effective and practical option, particularly for large orders.
Introduction to Custom Printing
Screen Printing
Silkscreen printing, also known as screen printing, refers to a type of printing that uses a specially-made screen.
You can imagine the screen as a kind of stencil. Your design or artwork is transferred onto a silkscreen through a UV process. As part of which, your design is digitally inverted and printed onto a piece of transparency. This is then exposed to a screen that is coated with a layer of light-sensitive emulsion. After being exposed to UV light, the negative area or negative space of your design is blocked out on the screen. When ink is spread across the screen, it only passes through where the screen is not blocked out. What is imprinted onto the fabric would thus be your design.
Silkscreen printing is especially cost effective for large quantity orders. With a large print run, the initial screen fee or set-up fee becomes negligible when it is spread across large order quantities. The print fee per piece also works out lower than other finishing methods. Moreover, once a screen is set up, it is relatively quick to produce each piece.
Each screen can only print one design. This means that if you are wanting to print at different positions, such as a front chest logo and a print on the back, you need two screens. Be mindful that additional screens add to the overall cost, but this can be easily offset with a large print run.
Similarly, a screen has to be made for each colour in your design. In addition, it involves careful alignment to match up the print of each colour perfectly, so that all the components line up. Complicated, multi-coloured designs are thus not recommended for silkscreen printing. We recommend single colour designs for screen printing.
Watch how screen printing works:
Direct-to-Garment (DTG) and Heat Transfer
Direct-to-garment is a method of printing that works similarly to printing paper with a standard printer. The image is directly printed on the garment through an inkjet printing method. As such, it is suitable for more complex designs. This includes photographic, graphic images or designs containing many colours or gradient.
However, DTG is a slower process and takes more time to produce per piece. Also, print position has to be fixed for DTG. As such, DTG is best for smaller orders with a standardised print and print location.
Heat transfer involves printing the mirror image of the design onto a heat transfer paper. When the printed paper and the fabric are pressed together under high temperatures, under a heat press, the special ink transfers onto fabric.
Heat transfer is great for small orders and high levels of customisation.
Watch how direct-to-garment and heat transfer printing works:
Further reading:
Which T-shirt printing method should you use?
The difference between screen printing vs direct-to-garment
Before you Start a Custom Print Order
Now that you've decided to go for custom print, you need to finalise some details such as print size, position and colour. Knowing exactly what you need will help you place an order quickly and efficiently.
Colour
For basic colours such as black, white and red, pre-mixed inks will be used. However, we understand the importance of branding and corporate colours. As such, we can match the print colour accordingly to your specified colour. Just remember to let us know in your order, and do provide us a Pantone code using Pantone Solid Coated+.
The same goes for speciality colours and inks including metallic, neon or fluorescent ones.
Print position
Common print positions:
- Left chest (logo)
- Across chest
- Full front
- Back below collar
- Full Back
- Sleeve
Custom print products include:
- Custom printed tees
- Custom polo tees
- Custom scrubs
- Custom lab coats
- Custom printed aprons
- Custom laptop cases
Screen printing requires a substantial flat surface in order to print properly. As such, products such as caps and structured hats may not be printed. For these, you can consider other decoration methods such as embroidery.
Most areas are printable, but do allow an allowance near the seams. It is also not possible to print over things like zippers, buttons and so on.
Size of print
Recommended print dimensions for custom print:
Chest and sleeve logo: no bigger than 7.5cm x 7.5cm or 10cm x 4cm
Bigger prints: within A4 or A3
For bigger prints (on the back, across front chest, etc) screen printing go by standardised sizes of A5, A4 and A3. We recommend that you try to fit your artwork within these size dimensions, as custom print will be charged accordingly to screen size. For example, if your design is just bigger than A4, do scale it to fit A4. Otherwise, it will be priced as an A3 print.
In terms of configuring print dimensions, do keep your size breakdown in mind. If your order includes both XS and XL for example, the print has to be able to fit on the XS tee with an appropriate allowance. At the same time, it shouldn't look too small on a XL. The print dimensions should thus be adjusted accordingly to your size breakdown and quantities.
Details and complexity of artwork
Screen printing is best suited for simple logos, text and artwork. Small details, such as fine lines, small text and tiny little dots, are generally not encouraged for screen printing. We recommend the following specifications:
- Minimum thickness of 0.3cm for lines
- Minimum text height of 1cm
- Avoid tiny dots or speckles
- Avoid shading
Ink passes through a silkscreen 'stencil' to imprint the design on the fabric. Tiny, fine details cause ink to clog up the specified area of the screen easily, after a few prints. The same happens if you have large patches of colour in your design. They tend to result in a messy blob of print, and the resulting print will not turn out nicely.
For anything more complicated, or highly detailed, consider alternative print methods such as Direct to Garment (DTG) or heat transfer. You can refer to our guide here for more in-depth comparison between the different print types.
Preparing your Digital Assets
To streamline your ordering process for custom print, it's important to have your artwork or design ready to start your order.
Having the artwork in the right file format and requirements will help to in processing the order smoothly, while minimising hassle and miscommunication.
Furthermore, for silkscreen printing, a mesh screen is specially prepared for each design/order. The design cannot be changed once the screen is prepared, unless you make a new screen. This incurs additional and unnecessary costs which we want to avoid.
We've put together some simple preparation tips below to guide you through:
Keep it simple
Keep your artwork simple. Simple line work or linear images are recommended. Fine details and large patches of colour are difficult to print as it clogs the silkscreen easily.
- Minimum line thickness of 0.3cm
- Minimum text height of 1cm
- Avoid tiny dots or speckles
- Avoid shading
- Avoid large patches of colour
File format
Having your design file in vector is the most ideal for screen printing, this means a vector image in AI, SVG or EPS file format. A vector design file or image gives a versatile file format that works in computerised pathways, making it optimal for processing print orders.
If your artwork is in rasterised form (e.g. PNG, JPEG, GIF, TIFF), you would need to converted.
Further Reading:
How to vectorise a logo or an image
Any area that is not being printed should be transparent in your file.
Hot tip
We recommend printing out your design on paper, in the corresponding size, to test out your artwork. This will give you a real sense of how it will look physically, and whether it is too big or too small. You can also use this method to check whether any lines or text are too fine or small. You can even try placing it against your shirt or whichever area you want printed, to visualise the outcome.
Doing this will help you determine if you need to make adjustments to optimise your design for printing.
Beginner's Guide to Custom Embroidery
In this section we'll introduce custom embroidery and embroidered tags in greater detail. We'll take you through different details you need to consider before placing an order.
If you are planning to embroider your logo or custom design, you will also be guided on how you can get your artwork embroidery-ready.
Introduction to Embroidery and Embroidered Tags
Embroidery entails the process of stitching a design onto fabric using embroidery thread. The design is digitally transmitted to an embroidery machine. Through a computerised process, the embroidery machine recreates the artwork using a series, or a few clusters, of stitches. The result is a tactile and quality finish to your custom items. With your design securely sewn into the fabric, embroidery gives a long-lasting finish that can withstand prolonged wash and wear.
Bearing a relatively low set up cost-per-order makes embroidery suitable for small-scale customisation. Options like custom name embroidery is thus popular and affordable.
Another option for embroidered decorations would be embroidered tags or patches. These are especially useful for things like name tags. Embroidered tags can be removed and replaced from existing uniform, in case there are changes in job title, name of staff, and so on. This is cheaper and more efficient than replacing the entire uniform.
Embroidered patches can also make excellent marketing and promotional product. With your brand logo, artwork or design embroidered, it can be handed out and attached to other things such as bags.
Unlike standard embroidery, for embroidered tags and patches the embroidery is done on a separate piece of fabric. The patch is then properly hemmed with a bordering embroidery stitch. These tag and patches can be embroidered with only text, logo artwork, or both.
Watch how embroidery works in mass production:
Before you Start a Custom Embroidery Order
When placing an order for custom embroidery, it is handy to know exactly what you require. Getting the specifications right will save you considerable time in the ordering process.
Let's go through some specifications like embroidery size, position and colour.
Colour
White, black and red are our most common embroidery colours. Alternatively, you can retain your brand or corporate colour, as we can match this to the closest embroidery thread.
Do be mindful that custom embroidery is charged per colour. Meaning the more colours there are in your embroidery, the more expensive it becomes. If possible, we recommend minimising the number of colours within your artwork or design. You can merge similar colours, or simplify the design. We recommend 1-3 colours per embroidery.
Details
It's especially important to pay attention to fine details in your logo or design, such as lines, text and dots if any. Lines that are too fine and thin, text too small and dots too tiny are very difficult to achieve in embroidery with accuracy. What results is often unclear, messy or unreadable embroidery that taints the overall image of your logo or artwork. We recommend the below guidelines to go by:
- Minimum thickness of 0.3cm for lines
- Minimum text height of 0.5cm
- No tiny dots or speckles
- No gradient and shading
Placement
Some common placements for embroidery on a uniform top:
- Chest
- Above chest pocket
- On chest pocket
- Sleeve (above elbow)
- Back (below collar)
Products commonly embroidered:
- Custom technician shirt
- Custom work shirt
- Custom polo shirt
- Custom apron
- Embroidered cap and hat
- Custom scrubs
Logos are usually embroidered at a default left chest position. This allows for easy recognition and identification. As embroidery is versatile, most areas and placements can be embroidered as long as it is not interfered by hardware like buttons, zippers and fasteners.
Similarly, most fabric products can be embroidered, as long as they bear sufficient weight. While it may be possible to embroider on thin materials, it will result in a stiffened area where the embroidery is.
Size of embroidery
Do consider the size of your embroidery in relation to placement and type of product. You don't want anything too big and awkward, nor do you want your embroidered logo to turn out inconspicuous. As such, we recommend the size dimensions below for different embroidery placements:
- Chest and sleeve logo: no bigger than 7cm x 7cm or 4cm x 10cm
- Hat or cap logo: no bigger than 4cm x 5cm
- Statement logo: up to 20cm x 8cm
The recommended embroidery size for logo (7cm x 7cm), for example, is proportionally ideal on a standard uniform top. It is not too big when applied on smaller sizes (≤ S), nor too small on bigger sizes (≥ XL). Of course, you can adjust embroidery sizes according. Say, if you are ordering mostly bigger sizes then it makes sense to make the logo bigger.
The same goes for other placements and embroidery on other product. Do always consider the size of the embroidery in relation to the product, placement and size breakdown of the order.
A small point to note: when you scale your artwork down to the recommended dimensions, do be mindful of any fine text or lines. You might need to adjust your artwork accordingly and alter the sizes of the components. Do refer to our section on artwork preparation for more details.
Watch: the limitations of embroidery & a basic guide
For Custom Embroidered Tags and Patches:
While most things are the same as embroidery, there are a few things specific to embroidery tags and patches that you need to consider:
Size of embroidery tag and patch
Similar to what we've mentioned for embroidery before, we recommend a standard set of dimensions for embroidery tags. These are determined according to where the tag or patch is intended for, and what kind of embroidery tag or patch it is.
Standard name tag: 10cm x 2.5-4.5cm
Rounded square tags: 4cm x 5cm or 3.5cm x 6cm
Circular patches: diameter of 5cm
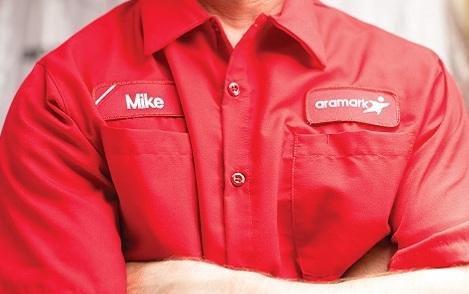
For custom name tags, the height of the embroidery tag depends on the number of lines of text. This can vary from 1 to 3. Other than name, you might include other details such as designation, position, department, division, team and so on. The more lines of text there are, the more the height of the tag.
Another thing to note is that custom name tags come with standardised width. The width is normally kept at 10cm, regardless of the length of the name, for the sake of consistency across all uniforms. As such, for longer names, it might be necessary to shorten it or use initials for some parts of the name.
Shape
The most commonly used shapes for embroidered tags include:
- Rectangle
- Square
- Circle
- Rounded rectangle
- Rounded square
- Arc
- Custom shape
The shape of your embroidered tag depends on what you need embroidered. For instance, rectangular and square would suit text best. Meanwhile, circular patches would suit logo and artwork designs better. You can also have custom shapes for your embroidery tag or patch. This can be cut according to the overall shape of your logo or design, for example.
Border and background
While the standard background colour is white, different background colours are also possible. A matching coloured fabric will thus be used for the embroidered patch or tag.
By default, the embroidered border will follow the colour of the content. For example, if your name is to be embroidered in blue, the embroidered border will also be blue. However, you can always choose a different border colour for colour coding purposes, or just for a touch of contrast.
Tag attachment
Another thing to decide is how your embroidery tags will be attached to your uniform. Commonly used methods include:
- Sewn-on
- Velcro
- Iron-on
Custom embroidery tags are normally sewn on to uniform to attach it securely. Velcro embroidery tags are another option. A velcro layer would be attached to the embroidered tag and the uniform respectively for a detachable and interchangeable velcro tag. Otherwise, you can go for iron-on embroidered patches. With an adhesive layer, it can be easily applied to garments with a hot iron.
Preparing your Digital Assets
For logo embroidery or embroidery with custom design, you would want to make sure the artwork is embroidery-ready.
Not only does this help to make the whole ordering process a lot smoother and fuss-free, it will ensure that your custom embroidery design translates beautifully and turns out well. Below we've outlined some guidelines on how you can optimise your artwork for embroidery.
Keep it simple
Keep your artwork simple. We recommend large, flat areas of solid colour fill. Fine details are difficult and sometimes impossible to capture with embroidery.
Things to look out for:
- Avoid fine details, such as tiny dots
- No gradient; areas filled with flat solid colours only
- No fine lines; minimum line thickness of 0.3cm
- Avoid small text; minimum text height is 0.5cm
Anything finer may not be possible to embroider.
File format
For embroidery you would require a vectorised artwork. A vector image in SVG form would be the most compatible and optimal file format for embroidery. This gives a clean, scalable version that can be easily translated for digital embroidery. It entails that the artwork is configured into a series of computerised pathways that can be read and picked up easily.
If your logo is in rasterised form (e.g. PNG, JPEG, GIF, TIFF), you would need to converted. You can learn how to do so through our step-by-step guide on how to vectorise an art file.
Any area that is not being embroidered should be transparent in your file.
For text-only embroidery, you don't need to prepare any files. Standardised fonts would normally be used for text embroidery.
Hot tip
We recommend printing out your design on paper, in the corresponding size, to test out your artwork. This will give you a real sense of how it will look physically, and whether it is too big or too small. You can even try placing it against your shirt or whichever area you want embroidered. Doing this will help you determine if you need to make adjustments to optimise your design for embroidery.
You can also use this method to check whether any lines or text are too fine or small for embroidery.
Conclusion: The Importance of Quality Finishing
With a better understanding of what custom decoration is and what specifications you need for it, you can get custom print and embroidery done right with minimal fuss. Custom decoration and finishing is essential for effective uniform management, uniform branding and uniform functionality. More importantly, quality and value is key when it comes to customising uniform.
To conclude, we've highlighted key reasons for quality finishing, and how you can optimise custom finishings for your uniform needs.
Identification and Management
Custom decoration such as custom name tag helps identify respective staff. For front-facing job roles, this is essential in differentiating staff from customers and members of the public. It also helps them to recognise who is serving them. For example, it makes it easy for patients to identify their attending nurse or doctor. At the same time, it also helps staff to identify their co-workers and colleagues within the work place.
For custom workwear, custom finishing helps improve workplace visibility. Decoration methods such as fluorescent print, reflective print and reflective trims plays a key role in ensuring identification and visibility in dark, low visibility working conditions. This contributes to workplace safety for your staff.
To regulate systems of laundering and washing of staff uniform, custom decorations is important in tagging each uniform. You would want something secure that will not come off easily in rigorous laundry processes and handling, so as to minimise mix up and reduce unnecessary confusion. Quality custom finishing allows for efficient uniform management.
Team spirit
Custom decorations, such as custom logo branding and custom name embroidery, can help in building team spirit. It helps employees better identity with their company or brand. Custom uniform serves as a tangible way for employees to connect with the company or organisation they work with. It embeds a cohesive team spirit within the team or corporation, and brings different members of the team together.
Similarly, it imbues a sense of uniform ownership among staff. Uniforms personalised with custom name embroidery, for example, designates uniform to individual staff. Thus it encourages staff to take care of their uniform, handle it responsibly and maintain it in good condition. Good care and maintenance of uniform helps to prolong the lifespan of each set of uniform. This plays a part in ensuring that uniforms last longer and reduces the need and frequency for replacement.
Branding
Custom decorations helps imaging your staff as core ambassadors of your company, brand or business. Opting for quality custom decoration plays a key role in conveying professionalism and key company values. It reflects how your team take pride in their work, how they present themselves and the impression they leave upon others.
More than just uniforms, custom print and embroidery can also be used for brand merchandise and promotional materials.
Manufacturing plants, hospitals & labs use MF to automate orders and manage their uniforms.
Learn more